Monday, 29 December 2014

Projects At Equinox Painting

I've had a lot of free time for painting recently and have three projects to talk about, one just complete yesterday, the other ongoing diorama, and also a soon to commence kilted commission!

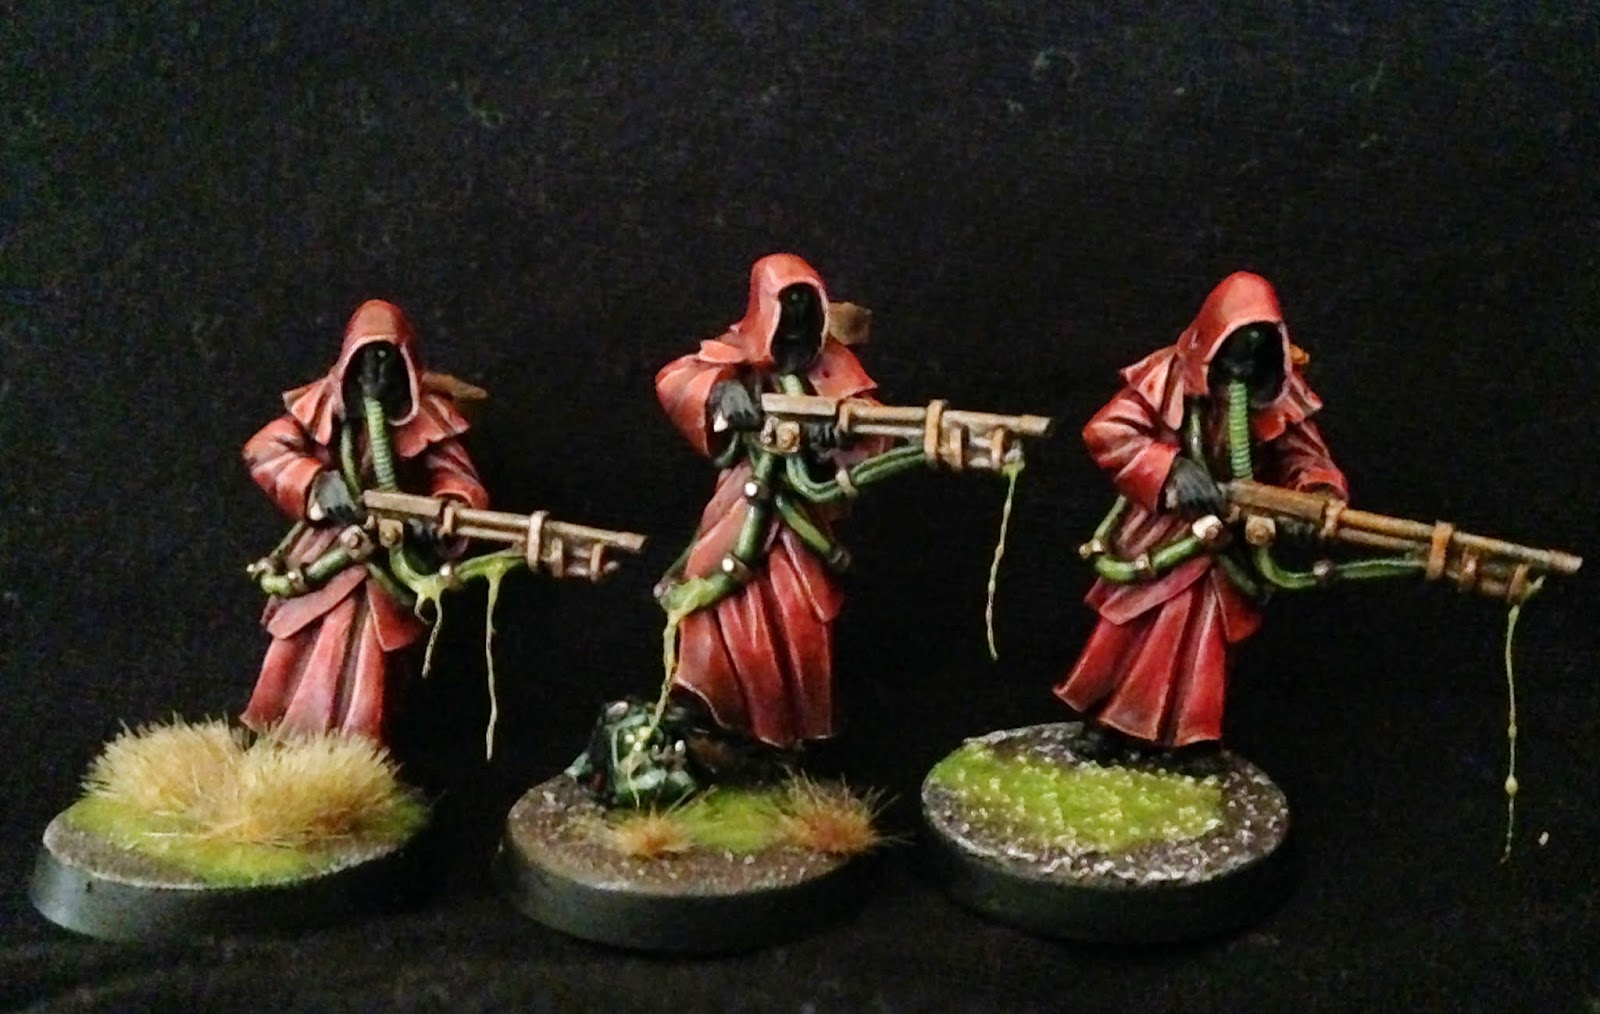
The project just completed was 23 Troopers / Flame troopers from Anvil and a forge world Magos Dominus, these are to be imperial mutants and used in 40k games as summoned daemons. Check out Jayden's Blog for a full description of these mutants.


Current Project

I had a lonely painted wych in my cabinet, and a spare painted burgle lord, so when I was painting a reaver jet bike and a plague toad I had an idea for a diorama. On a swamp watery base of drowned skulls and daemon & dark elder heads, theres a plague toad with its tongue wrapped around the bike about to crunch it up, whilst the escaped rider is jumping off of the tail, gun poised to fight the toad's rider.

Here most models are still in WIP, and everything is barely held together by objects not stuck so far:

I think with some proper time put into making the components fit in together, i'm hoping it will work out well.


Next Project

The next project is a squad I have been commissioned to do, and is Scottish sic-fi veterans, each having lost an arm replaced by a robotic limb. Im being sent the pieces to make these over the next couple of months mostly from Victoria miniatures and Anvil Industries.  
First I'll be doing the highland bases, so expect those soon!


Wednesday, 24 December 2014

Tox Troopers as Imperial Summoned Lesser Daemons Commission

One of two of these units complete, and the other not far behind meaning this entire imperial daemon commission in nearly complete!

The big bit of painting these models was the glazing on the red cloaks and edge highlighting on every surface and the lines running across the armour.  After painting the other two units I've found pretty efficient ways to do the rust weapons, ooze tubes and green glow.

Let me know if theres a technique or feature of these you'd like to see an article on, or if you'd like to get your own models commissioned!

Thursday, 18 December 2014

Blending: Styles and How To

I've been wanting to do a post on blending for a while, since it plays a large part of almost all of my display level miniatures. 

Firstly, blending is making a smooth transition from one colour to another, from a dark colour to a lighter version or it could be between hues e.g. purple to green.
I think for many painters it's their style of blending that makes their work recognisable to them, for example James Wappel's shaded basecoats / wet-blending give big variations in hue, whilst ThirdEyeNuke's realistic dirty and dark style is recognisable by the high contrast blends in value (light to dark) close to grey colours.

For my commission work I tend to do varying types or blending for whatever's required, but for my own display painting I've been trying to identify a style of my own but more on that later. Before that I'll outline the How To's of most of the types of blending I use.


First, wet blending:  (WIP reaver)


Take two paints either unthinned or with a small amount of drying retarder. Place a band of one colour one side of where the blend is to be, then next to it place another band of the colour to be blended to, and whilst both are still wet on the model, take slightly damp brush and using small side to side motions to blend between the two colours.


Instead of just blending the dark burgle to bright blue, to make the transition smoother I wet blended a dark purple to a dark blue, then the dark blue to a brighter blue.

For purple to blue wet blending works and can be quite a fast technique with not too many steps involved, but when the colour change becomes more dramatic, for example a dark red to bright green, wet blending can be a much harder method to get a smooth blend.

Most of the blending on this riptide was wet blending:


Two Brush Blending (Spiritseer)
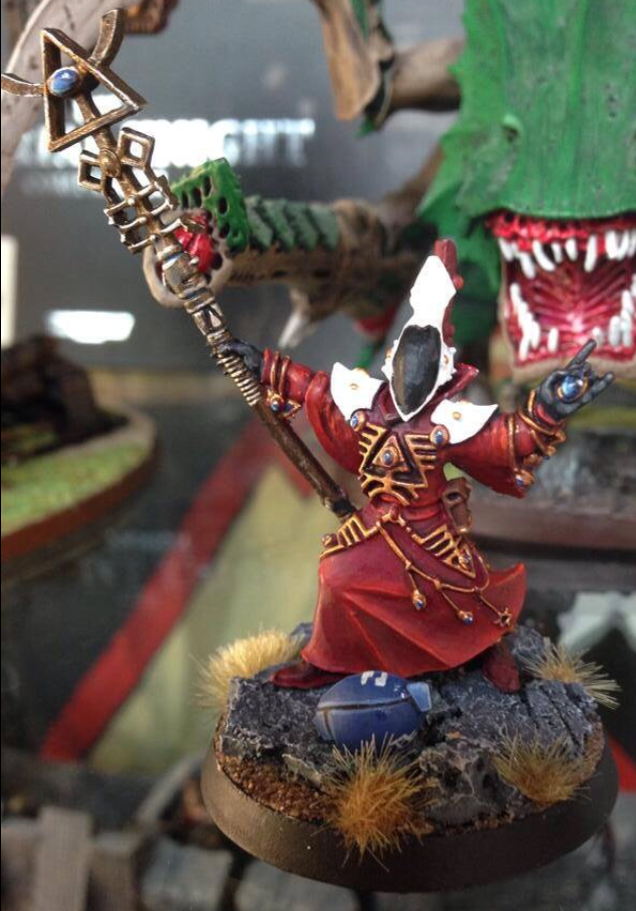


Bit of a misnomer as I don't use two brushes for the technique, but thats the way it is traditionally done. The paint is thinned with just a bit of water (or medium) to the consistency of what you'd normally use to paint a layer of a colour. The second brush is then damp, not saturated, and the small amount of water is used to drag paint out from the bounds a bit onto the other colour, smoothing the blend.


Instead of using a second brush I tend to just quickly wash out my first brush. Good thing about this technique is it takes no planning, unlike wet blending where you have to lay out the colours, with this, I sometime just apply a layer and if I think the line between colours is a bit harsh i'll just get a bit of water on my brush and quickly do a rough wet blend to smooth things out.


Glazing: (Eldar Warlock Blade)


Essentially thin your paints with water or medium or flow improver or a mix of those. For quick work I don't worry and just use water, most of the time I'll use acrylic medium, and occasionally flow improver for painting small areas. For testing consistency I use the skin test (also see handy painting article for smudge blending)  

Next, apply a thin glaze at the part you want a different colour, let it dry, apply another glaze further towards the different colour part, let it dry, repeat until the colour build up sufficiently. The good thing with this technique is less thinned paints will build up the colour quicker for a fast paint, whilst very thinned glazes can give seamless blends. Thats where it's necessary to experiment with the effects you get with different consistencies of glazes.

This technique doesn't rely on paints on the mini still being wet so you can come back to blending in another colour later, e.g. this green glow after the fabric was painted:


Layering: (Tau Ethereal)


The purple and black fabric on this model are layered. The number of layers is what makes the blend smooth. So for starting with a black / purple, i applied an opaque layer over the cape, mixed in a bit more purple, and applied a layer everywhere but the deepest recesses. a bit more purple, then applied more towards the highlight areas. then repeated over many many layers each slightly different from the last applied further towards the parts that are going to be that bright purple colour. The same process was done using grey instead of purple for the black robes.

I tend to find layering works very well with dark colours whilst i'll use it a lot less for brighter blends.


Feathering [Or at least how I do it]: (Eldar Weapon Platform WIP)


Video on how I painted the weapon  platform

The above is an example of a very smooth use of feathering, quite often though i'll use it with far less thin paint, just using the dragging jagged motion to blend, as on this weapon:


All of The Above:

I rarely create a blend with just one of these techniques, more often using a rough thicker paint blend; such as wet blending, rough feathering or layering, and then over the top of that glazing. Also there needn't be a clear cut distinction between these techniques, if I'm layering and the previous coat in an area hasn't dried yet, nothing stops me from just taking my brush and wet blending there to smooth out the colours. Edge highlights can also really create some great looks when used with blending, the important thing is to experiment yourself to find what works when. These can definitely be tricky techniques, and particularly with glazing I wasn't happy with my results for a long while.

I'll give some picture examples of what edge technique combinations can work well:


Using glazes to soften edge highlights to look right for fabric:

From this:

To this:


Using a rough feathered purple to green to build on and smooth with light and dark glazes up to white and down to near black:


Using layering, then multiple edge highlighting to make those layers pop:


I started off by talking about style, and how various artist are recognisable, I know i've tried quite a  few but I don't think I really have a particular aesthetic yet that makes my work recognisable or maybe to others there is? I'd be interested to see any opinions people have in the comments.

Anyway, I hope this blending guide was useful,  if you like leave a comment asking and I can add more depth on specific techniques I used on any of these models.


Saturday, 6 December 2014

Magos Dominus Commission Complete

This forge world 30k Mars Priest I've been painting for the last few weeks, the model will be a used as a greater daemon too fit in with being summoned by imperial 40k psykers.

There was A LOT of detail on this model and the face of the model isn't very visible so creating a focus for the eye to be drawn to on this model wasn't so straight forward. I instead tried to achieve that around the bright green OSL on and hand reaching through the ooze.


Thursday, 20 November 2014

Green Armour Video Tutorial and Commission Progress

Its been a while since a post, university interviews and the like getting in the way of hobby a bit. The other thing being a big commission I've been working on! I know some painters don't see 20 models as a lot, but I've been wanting to blend every cape, and edge highlight every armour panel, so it really has been taking a while!

I did paint the gun arms, bodies and heads separately, so here's an image of what they're looking like so far with the main parts, head, robes and armour, done:

I was asked a while ago to do a tutorial on how i do my green armour I've used in this project, as well as on my dark eldar.  Here's an image of the torsos in rows of stages of completion, and a video on how I achieved the result. (Due to an awkward angle to allow the camera to see, the edge highlighting did need a bit more tidying up afterward than in the examples at the end) 


Sunday, 12 October 2014

Golden Demon 2014

Here's my golden demon entry for this year, it got through the first cut, and after looking at some of the other awesome entries I'm sure I was nowhere near placing.
I think the standard in all categories this year
was the highest I've seen, perhaps that's because of GD being only once a year now.


I finished the model at about 3 last night, and then had to pull together that base after the one I intended to use broke - badly. All in all it turned out not to bad in the end I think :p

Next post on the blog will be some robed imperial demons, and once that's done, I could make a nmm guide like on my nurgle lord, if anyone's interested.

Saturday, 20 September 2014

Quick and Easy Slime Drips

I painted this unit a while ago and was the first time I put my experimenting with slime drips to use on a finished unit.
I found it a surprisingly simple technique for the results.

First, get some cotton wool and pull apart a small pinch of strands:


Pull and roll between your fingers the strands to make a fibre:


Super glue one end of the strand to the model, and if the non glued end is fraying, I just used plastic cutters to remove a few millimetres.


Next i just got a large brush, loaded it heavily with Nurgles Rot, and then dabbed it against the cotton wool strand to finish the look:


Tuesday, 2 September 2014

Red Cloak Painting Guide

Here is my tutorial for red robes. Perhaps slightly trickier to follow since they weren't painted in a particularly regular way, but i'l sure try my best to explain.

First was a base coat of Mephiston Red, i applied two thinned coats.
After this I shaded with red and purple washes, and then made my own wash from a black and red mix which i applied into the recesses.


Next i thinned some paints with mater and lahmian medium to be a bit more concentrated than a regular glaze i'd use. I glazed the robes in highlight areas back up to mephiston red, and then up to a mix of wazzadakka and mephiston red.


I mix Lugganath orange with a small amount of  wazzadakke red,  and then do a fast and not too accurate edge highlight on all edges.


I then glaze wazzadakka red, then wild rider red over the exposed highlight areas, whilst on the shadow's edge highlight i glaze the black and mephiston red mix.
I continue these layers until the edge highlight blends into the other colours on the model.
I then re-apply a thin and controlled edge highlight on the sharpest edges of the glazed area.
Bellow is a model where this step has been applied to the bottom half only.


The end result being red robes like this:


Monday, 1 September 2014

Flamers - Demons / Imperial / Tox

These flame troopers from Anvil industries are a part of a commission I'm working on where these models are to be themed summoned demons to fit in with the fluff and aesthetic of an imperial army.
The original models are fox flamer troopers from anvil industries, i whilst I do like hoe the scuply look, they are particularly fiddly to paint.


Tutorials are to follow, I've already lined up one for the slime drips for a future post, as for the red cloaks and other features of the models, are there any elements anyone would be interested in knowing how to recreate?

Sunday, 27 July 2014

Question Corner

On this blog there's a new page; question corner.

There, you may leave a comment(s) asking anything hobby (well - not airbrush stuff)
And wI ill give a reply on the page, hopefully giving all the information you need.

As some of you may have noticed, my previous post was in response to a question on inks in the comments; if I feel there's a lot to say about the topic, it may make it to being a full blog post.

Remember, the only stupid question is the one that's never asked :p


Runny Paints

Inks

Inks, washes, shades and glazes?  Their differences are subtle, but using them in the right place can give great looking effects on your miniatures; this post is in response to a request regarding to alternatives to inks due to their tendency to rub off.

An Ink from the old GW paint range:


Inks are now available from most art stores and some miniatures paint companies, this Daler Rowley ink I used for my very fast painted 20 minute plaguebearers, not a bad result for just a wash over a white undercoat:


Inks tend to be thicker than the washes / shades that GW now produces,  inks tint the surface as well as collect in recesses. Inks are used to shade a model, or change the hue of an area on the model; here are some alternative ways to achieve these effects:


Glazes

Well, they're slow - painting larger areas with them can takes ages! (Unless you take some good blending shortcuts - possibly a future post?)

However, done right they can give those shifts in colour even better and smoother than inks!


How to Glaze:
The Medium Way:  Paint + mix in equal amounts of water and GW lahmian medium - for getting the right consistency, see the hand test for glazes here: (http://equinoxpainting.blogspot.com.au/2014/07/handy-painting.html)
- Then just go ahead and apply the thinned paint in layers on the part of the model you want tinted that colour - eventually the colour builds up softly without any complex technique - just time consuming.

Slightly Less Smooth But Much Faster Glaze Method:
The Water Way:  Paint + water - for getting the right consistency, see the hand test for glazes here: (http://equinoxpainting.blogspot.com.au/2014/07/handy-painting.html)

And for water glazes i apply in a slightly different way - more feathering as shown in this video: https://www.facebook.com/photo.php?v=484340208336878


Make Your Own Shading Liquids

Essentially the same as for a medium glaze, with the exception that instead of medium using this stuff:


From there, add more or less water, more water will make a thinner mix - a wash to mostly just affect the recesses, whilst less will make an ink which will tint the surface of the model more as well as shade the recesses.

Model's flesh has been washed purple twice:


Lines

Alternatively, if the whole runny paint thing just isnt for you, theres always suing lines to paint in the darkest lines of your model, for these fire warrior legs i used a dark blue with black pain to give the less smooth crisper highlights between armour plates.


This can be a tricky technique requiring more brush control than inks or shades - but still doable with a bit of patience.